Chapter 23 · Part 3
Request IP Whitelist
Whitelist the server IPs that call our SMS API and WABA API yourself — no waiting for support. An email confirmation step keeps your account safe: no IP goes live until a secure link is approved.
What is IP whitelisting?
IP whitelisting restricts your SMS API and WhatsApp Business API (WABA) access to a list of approved server IP addresses. Once the feature is enabled, the API accepts calls only from IPs on your whitelist — so even if your API credentials were ever stolen, they’d be useless from anywhere else.
This page makes whitelisting self-service: you submit the IPv4 address of your server, confirm the request through a secure single-use link sent to your registered account email(s), and the IP is activated the moment the link is approved — no waiting for support, and every step is written to a security log.
Before you start
- Log in with the main account — sub accounts can’t request IP whitelisting. If you use a sub account, ask your main account administrator.
- Two-Factor Authentication (2FA) must be enabled — only 2FA-protected accounts can request. The page shows your status; if 2FA is off, contact us to enable it first.
- The IP whitelist feature must be enabled on your account — this is the setting that makes the API accept calls only from your approved IPs.
- Have your IPv4 address(es) ready — maximum 2 per request, e.g.
203.0.113.10. IPv6 can’t be requested online; contact us and we’ll handle it.
From request to active IP
Submit request
Up to 2 IPv4 IPs
Email sent
Secure link to your email(s)
Open secure link
Valid for 24 hours only
Approve request
Approver email, IP & time recorded
IP active
Whitelisted immediately
Not approved within 24 hours? The link expires automatically and no IP is whitelisted — simply submit a new request.
The flow in detail
Phase 1 · Submitting a request
Phase 1 · Submitting a request from the member portal.
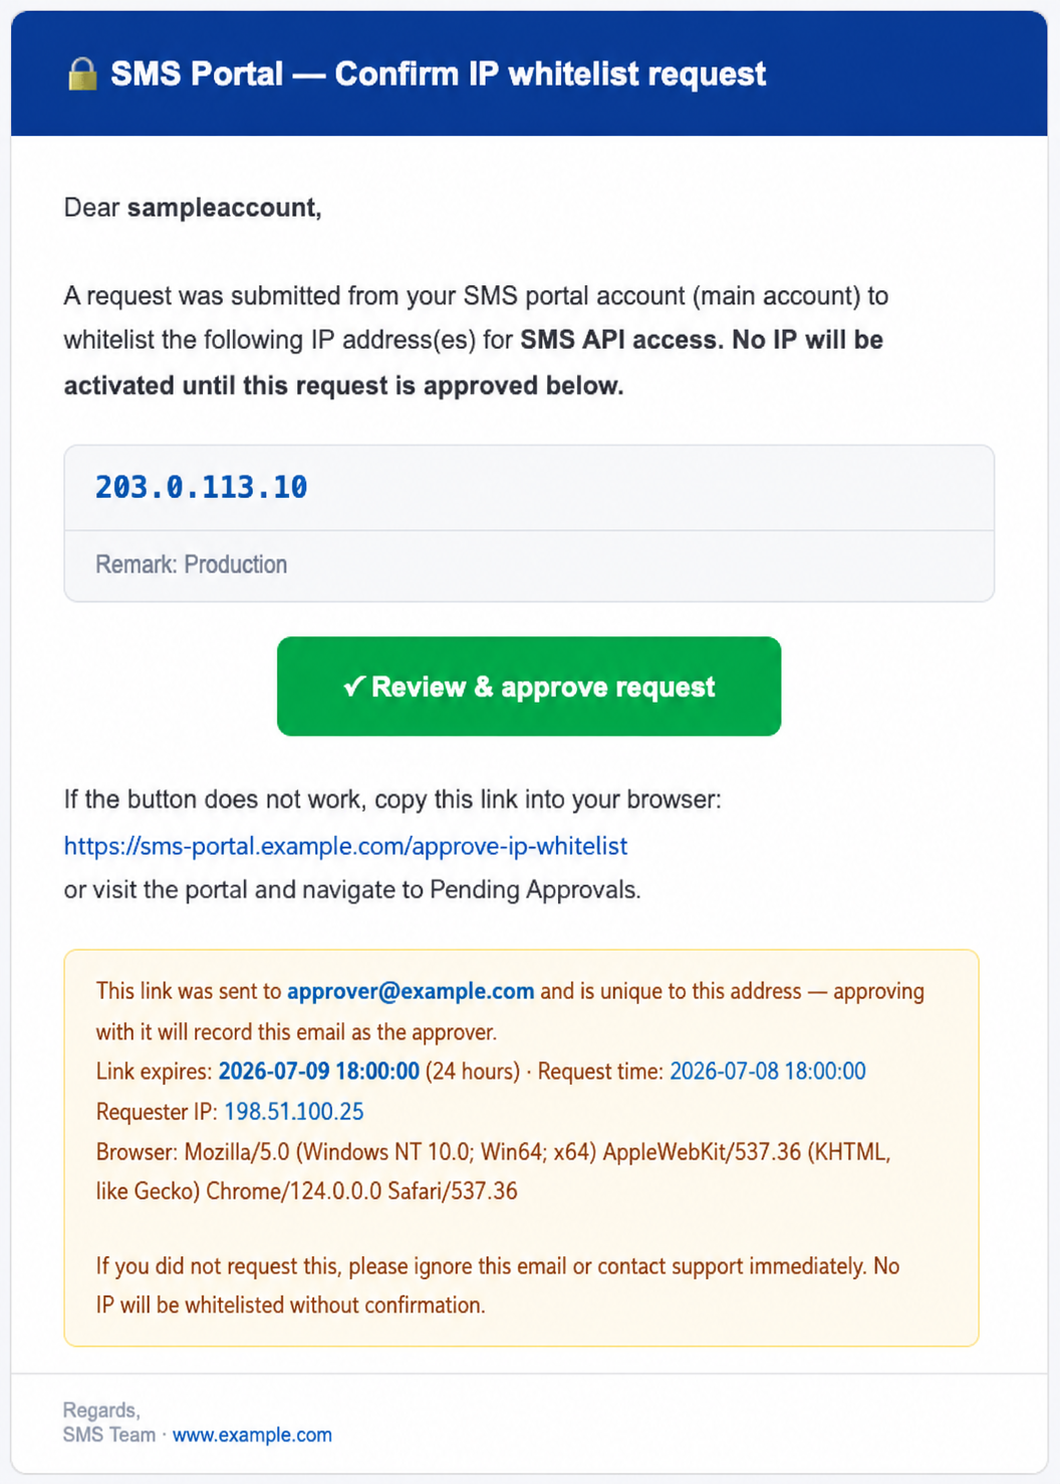
Nothing is whitelisted in phase 1 — the request just waits as pending. Every email address registered on your account receives the same request details, but each with its own unique link, so it’s always known exactly which address confirmed. Phase 2 is what happens when one of those links is opened:
Phase 2 · Confirming the request from your email
Phase 2 · Confirming the request from your email.
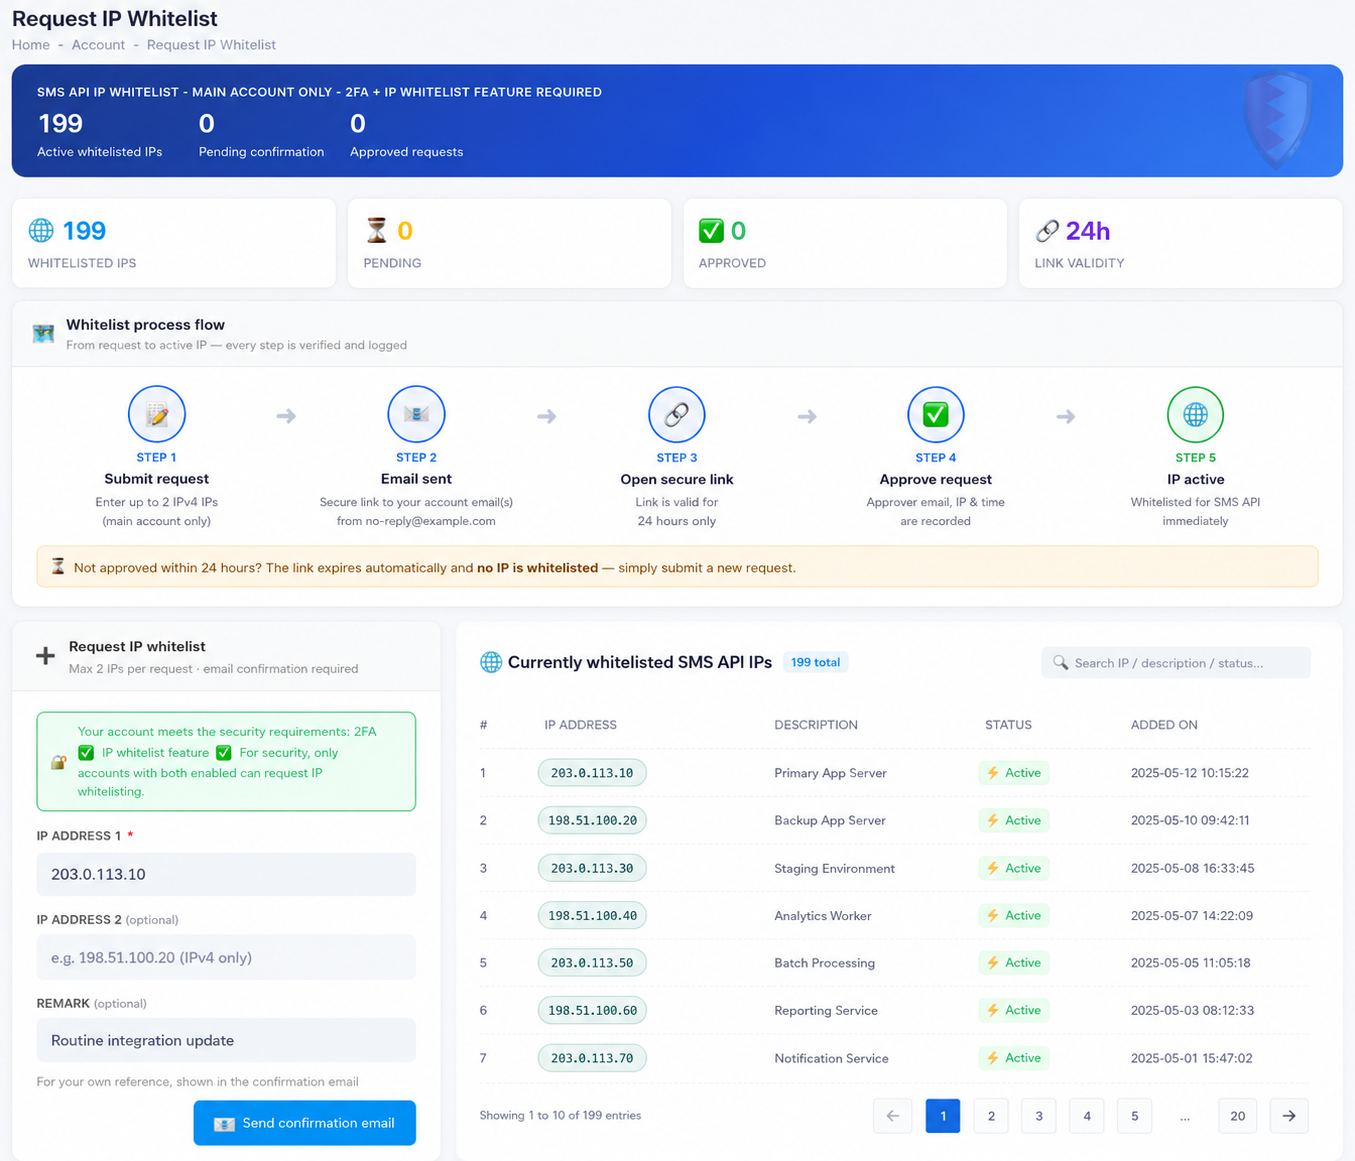
Your whitelist at a glance
Log in with your main account and open Account → Request IP Whitelist. The summary cards show where everything stands.
Request a whitelist
- 1
Check your security status
The green box on the request form confirms your account meets the requirements — 2FA and the IP whitelist feature both showing enabled. The page also lists your currently whitelisted IPs and request history.
- 2
Enter your IP address(es)
Fill in IP Address 1 (e.g.
203.0.113.10) — a second IP is optional, maximum 2 per request, IPv4 only. Add a short Remark (e.g. “Production server”) for your own reference; it’s shown in the confirmation email. - 3
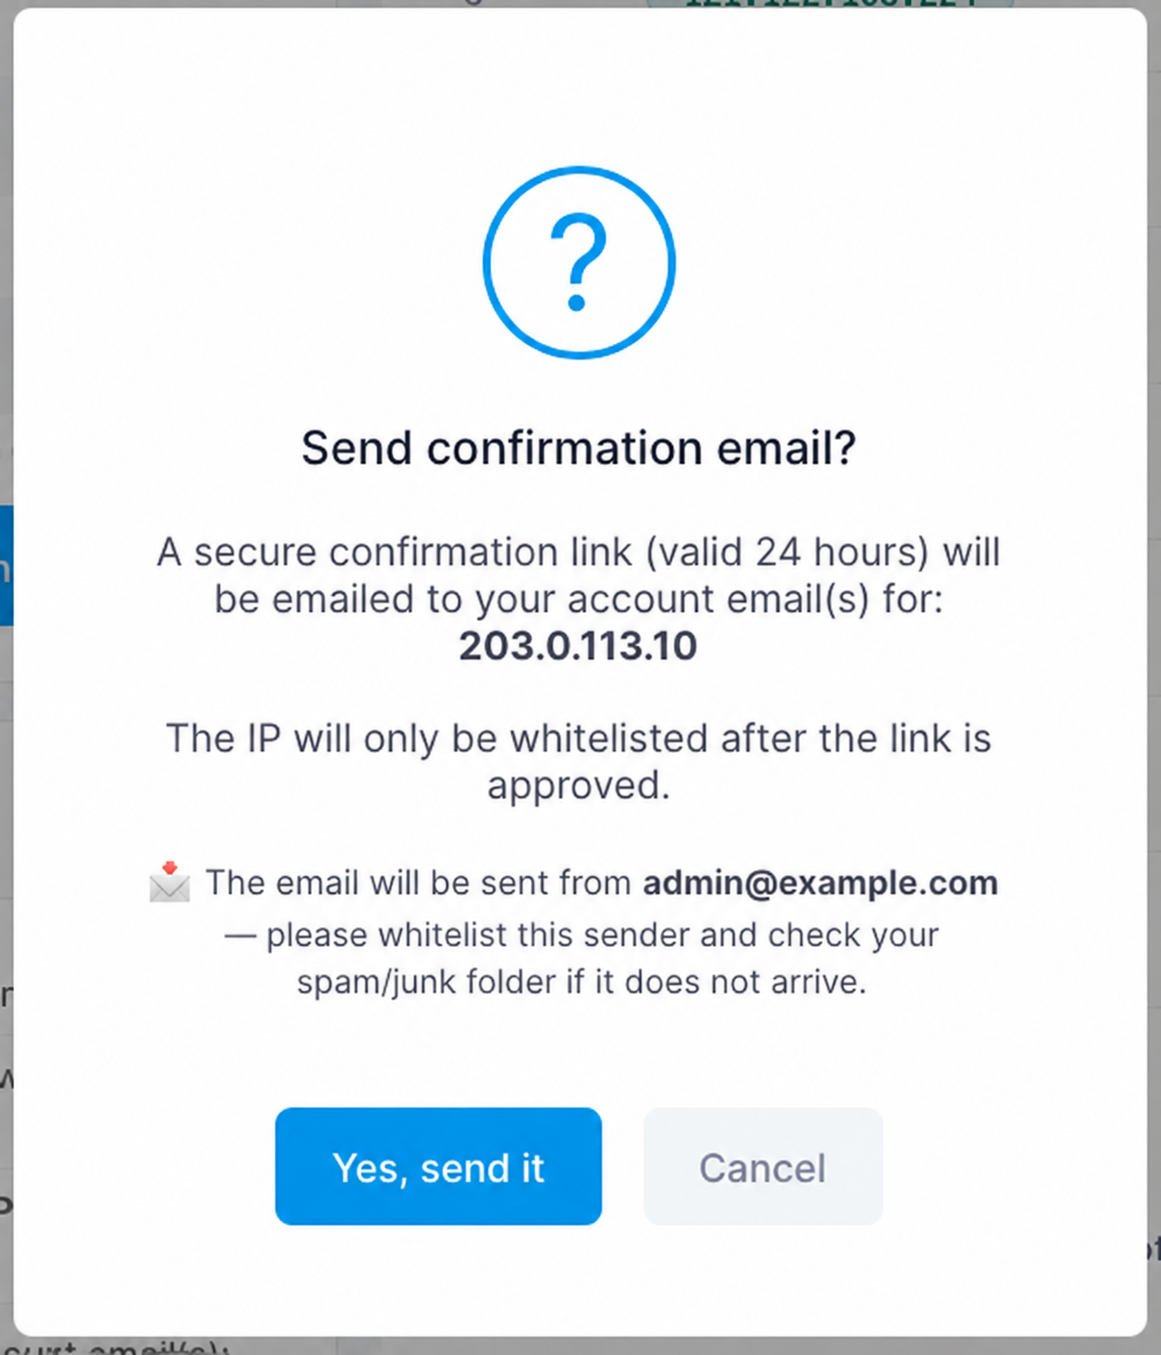
Send the confirmation email
Click Send confirmation email and confirm the dialog. Only one request can be pending at a time — if one is already waiting, approve it from your email or cancel it in the history table first.
Approve it from your email
- 1
Check your inbox
Every email address registered on your account receives the confirmation email, each with its own unique, single-use secure link that expires 24 hours after the request. If it doesn’t arrive within a few minutes, check your spam/junk folder and whitelist the sender address shown in the confirmation dialog.
- 2
Review the request
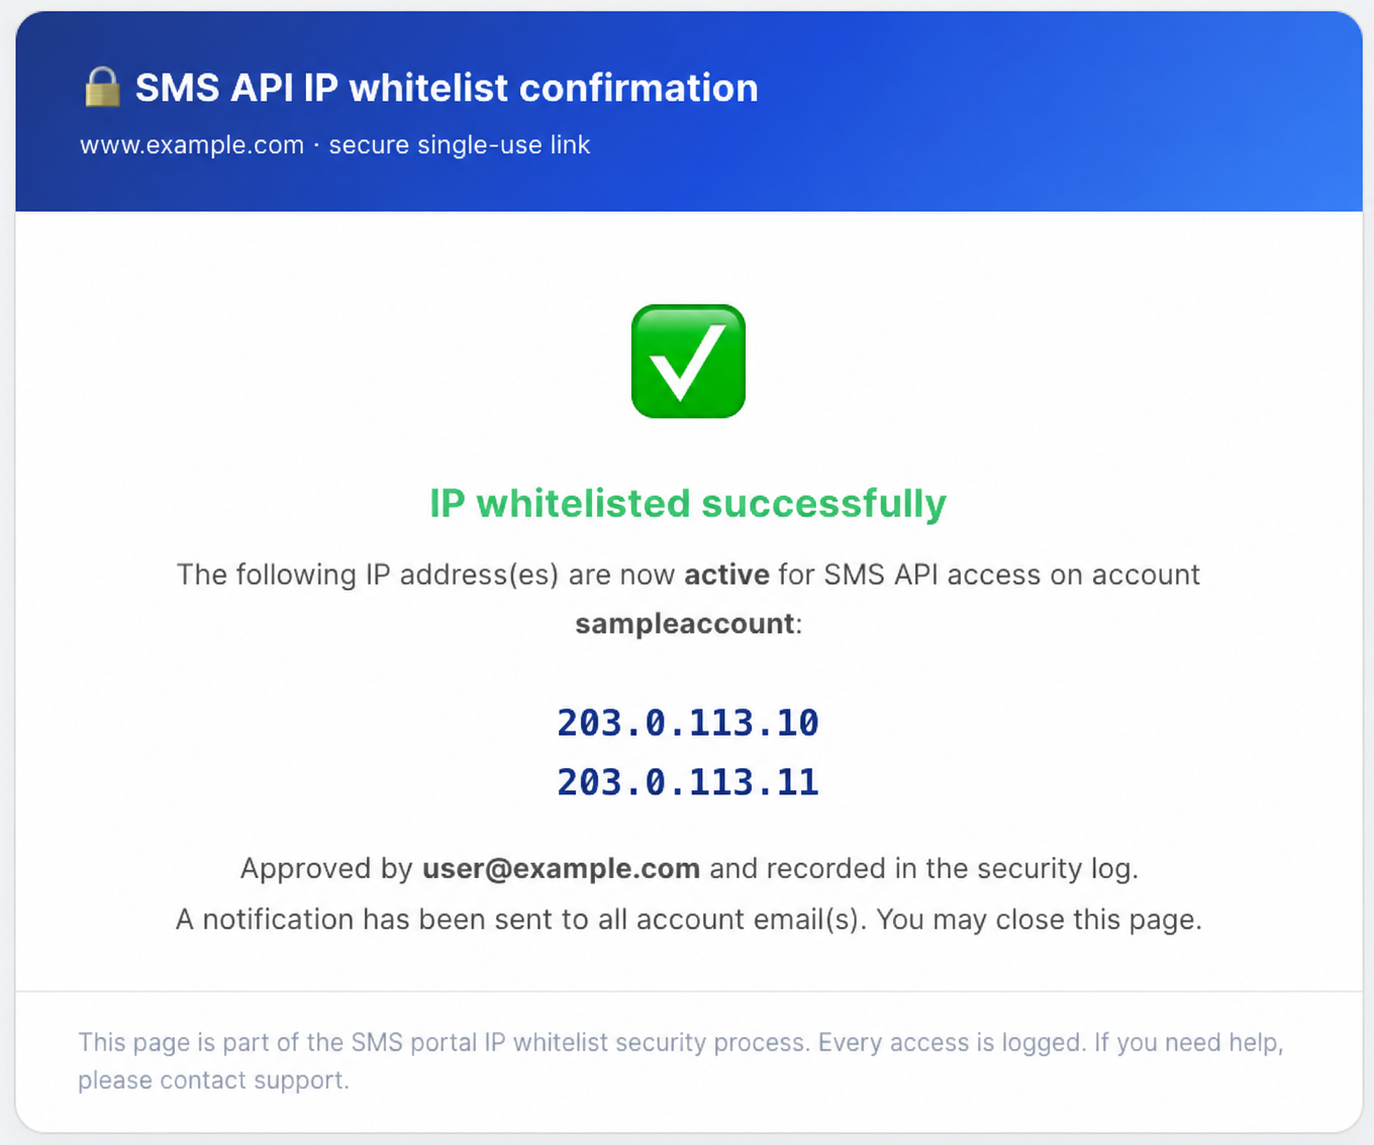
Click Review & approve request in the email. A secure page opens showing the full request — the IP address(es), remark, requester, request time, and the requester’s IP and browser. Check the details carefully. Just opening the link changes nothing; only pressing a button does.
- 3
Approve — or reject
If everything is correct, press Approve & whitelist now — the IPs go active for API access immediately. If you did not expect the request, press Reject request: nothing is whitelisted and every other link for that request stops working.
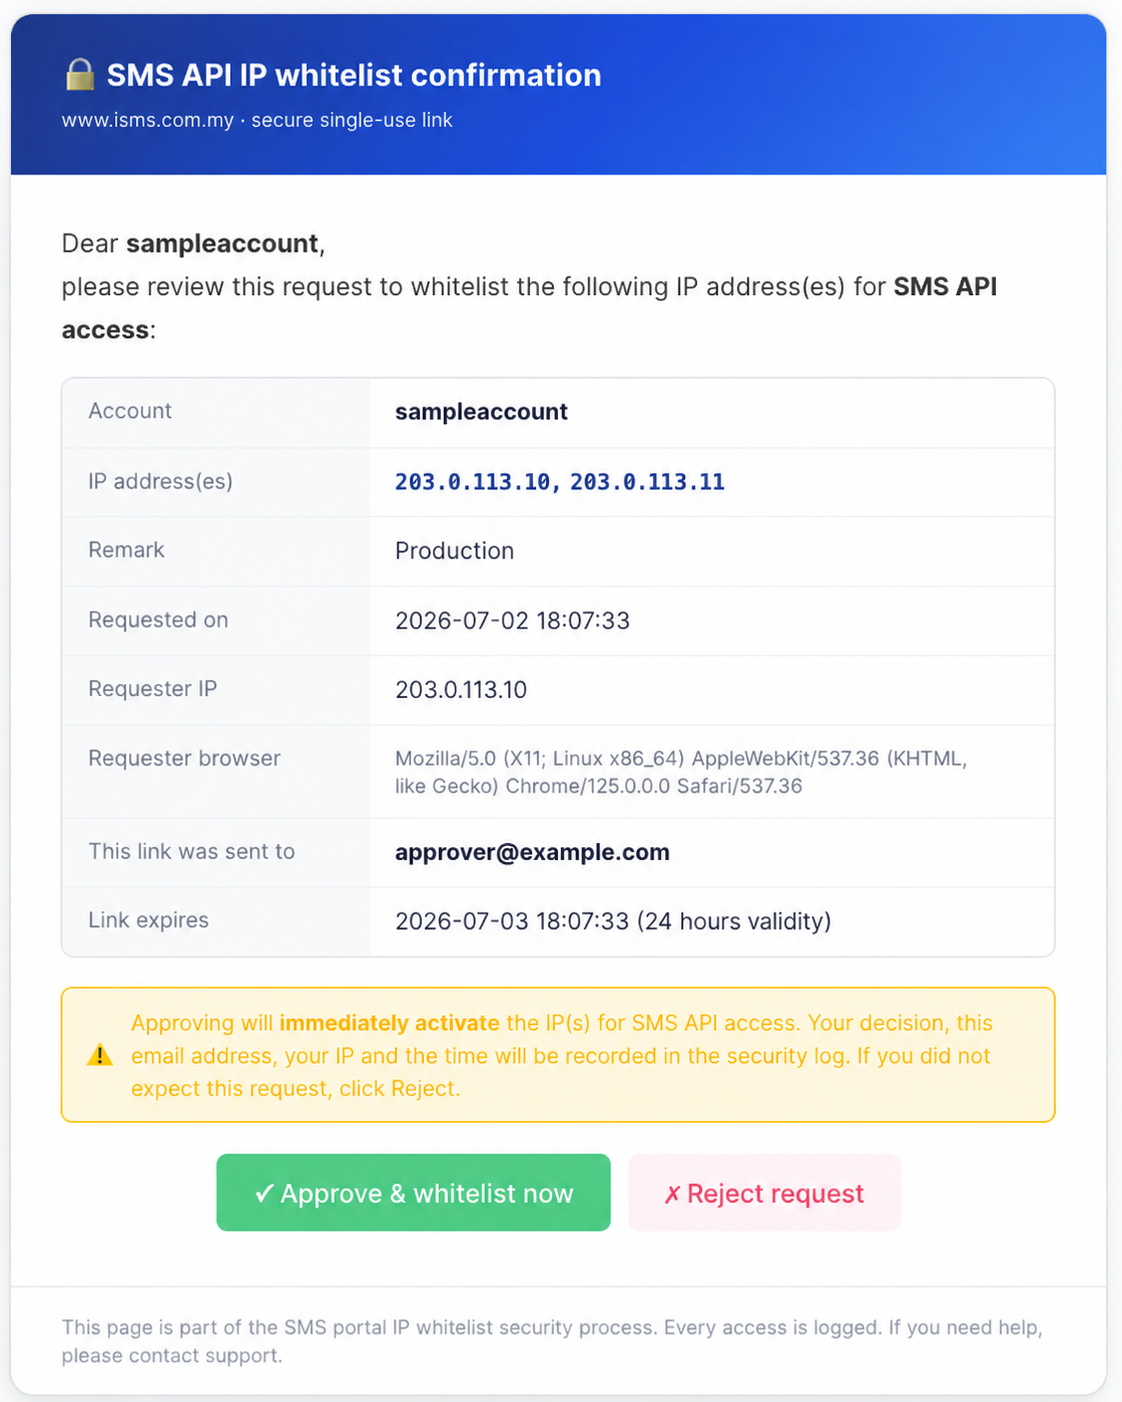
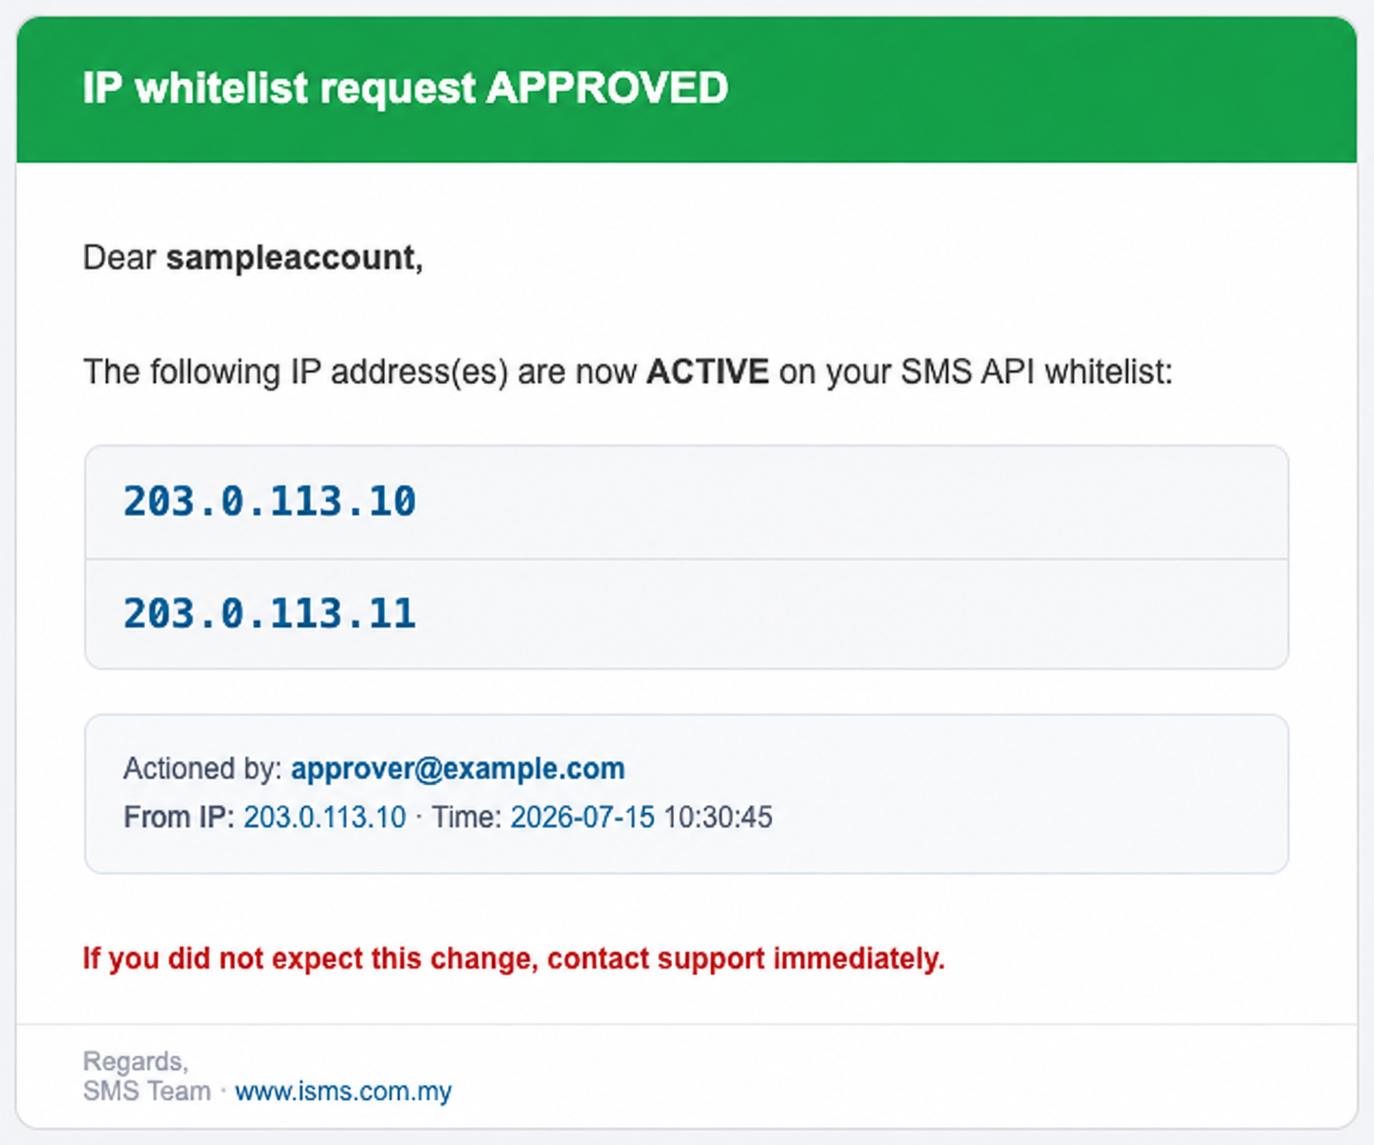
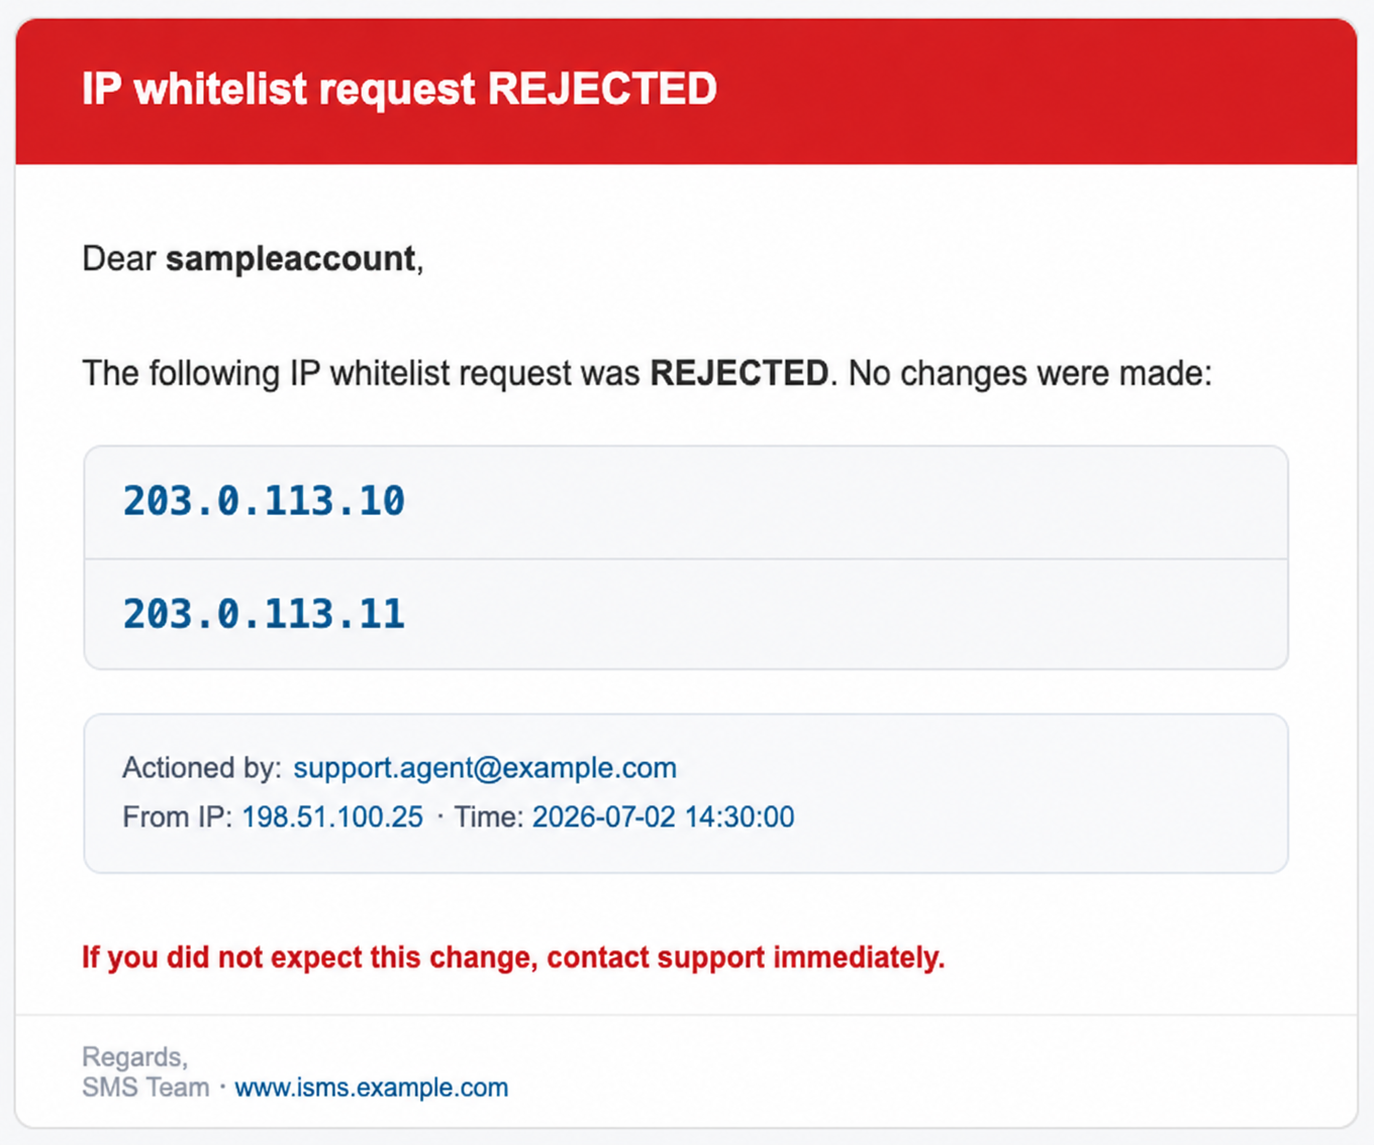
Everyone is notified
After any decision, a notice goes to all registered account emails stating the outcome, who actioned it, from which IP, and when — an unexpected change can’t stay hidden. If you receive a notification you don’t recognise, contact us immediately.
Track your requests
The request page keeps two searchable tables: Currently whitelisted API IPs (status and date added) and your Request history. A pending request can be cancelled any time — cancelling immediately invalidates the emailed links. To remove an already-whitelisted IP, please contact us; self-service covers adding IPs only.
- PendingWaiting for email confirmation — check your inbox. The history shows the link’s expiry time.
- ApprovedConfirmed and active, with the approver’s email and the time.
- RejectedDeclined from the email link. No IP was whitelisted.
- ExpiredNo one confirmed within 24 hours. Submit a new request if still needed.
- CancelledYou cancelled it from the portal before confirmation.
